Configuration Example, HPE Aruba
Aruba AOS 10 and Mesh Networking
René Jorissen on January 28, 2026
•
0 Comments
• Tags: #aos10 #aruba #mesh #point #portal
Mesh networking is not something you configure every day, but in certain scenarios it becomes the only viable solution. Typical reasons include locations where structured cabling is impossible, or—as in this case—when there is no physical connection available between two separate buildings.
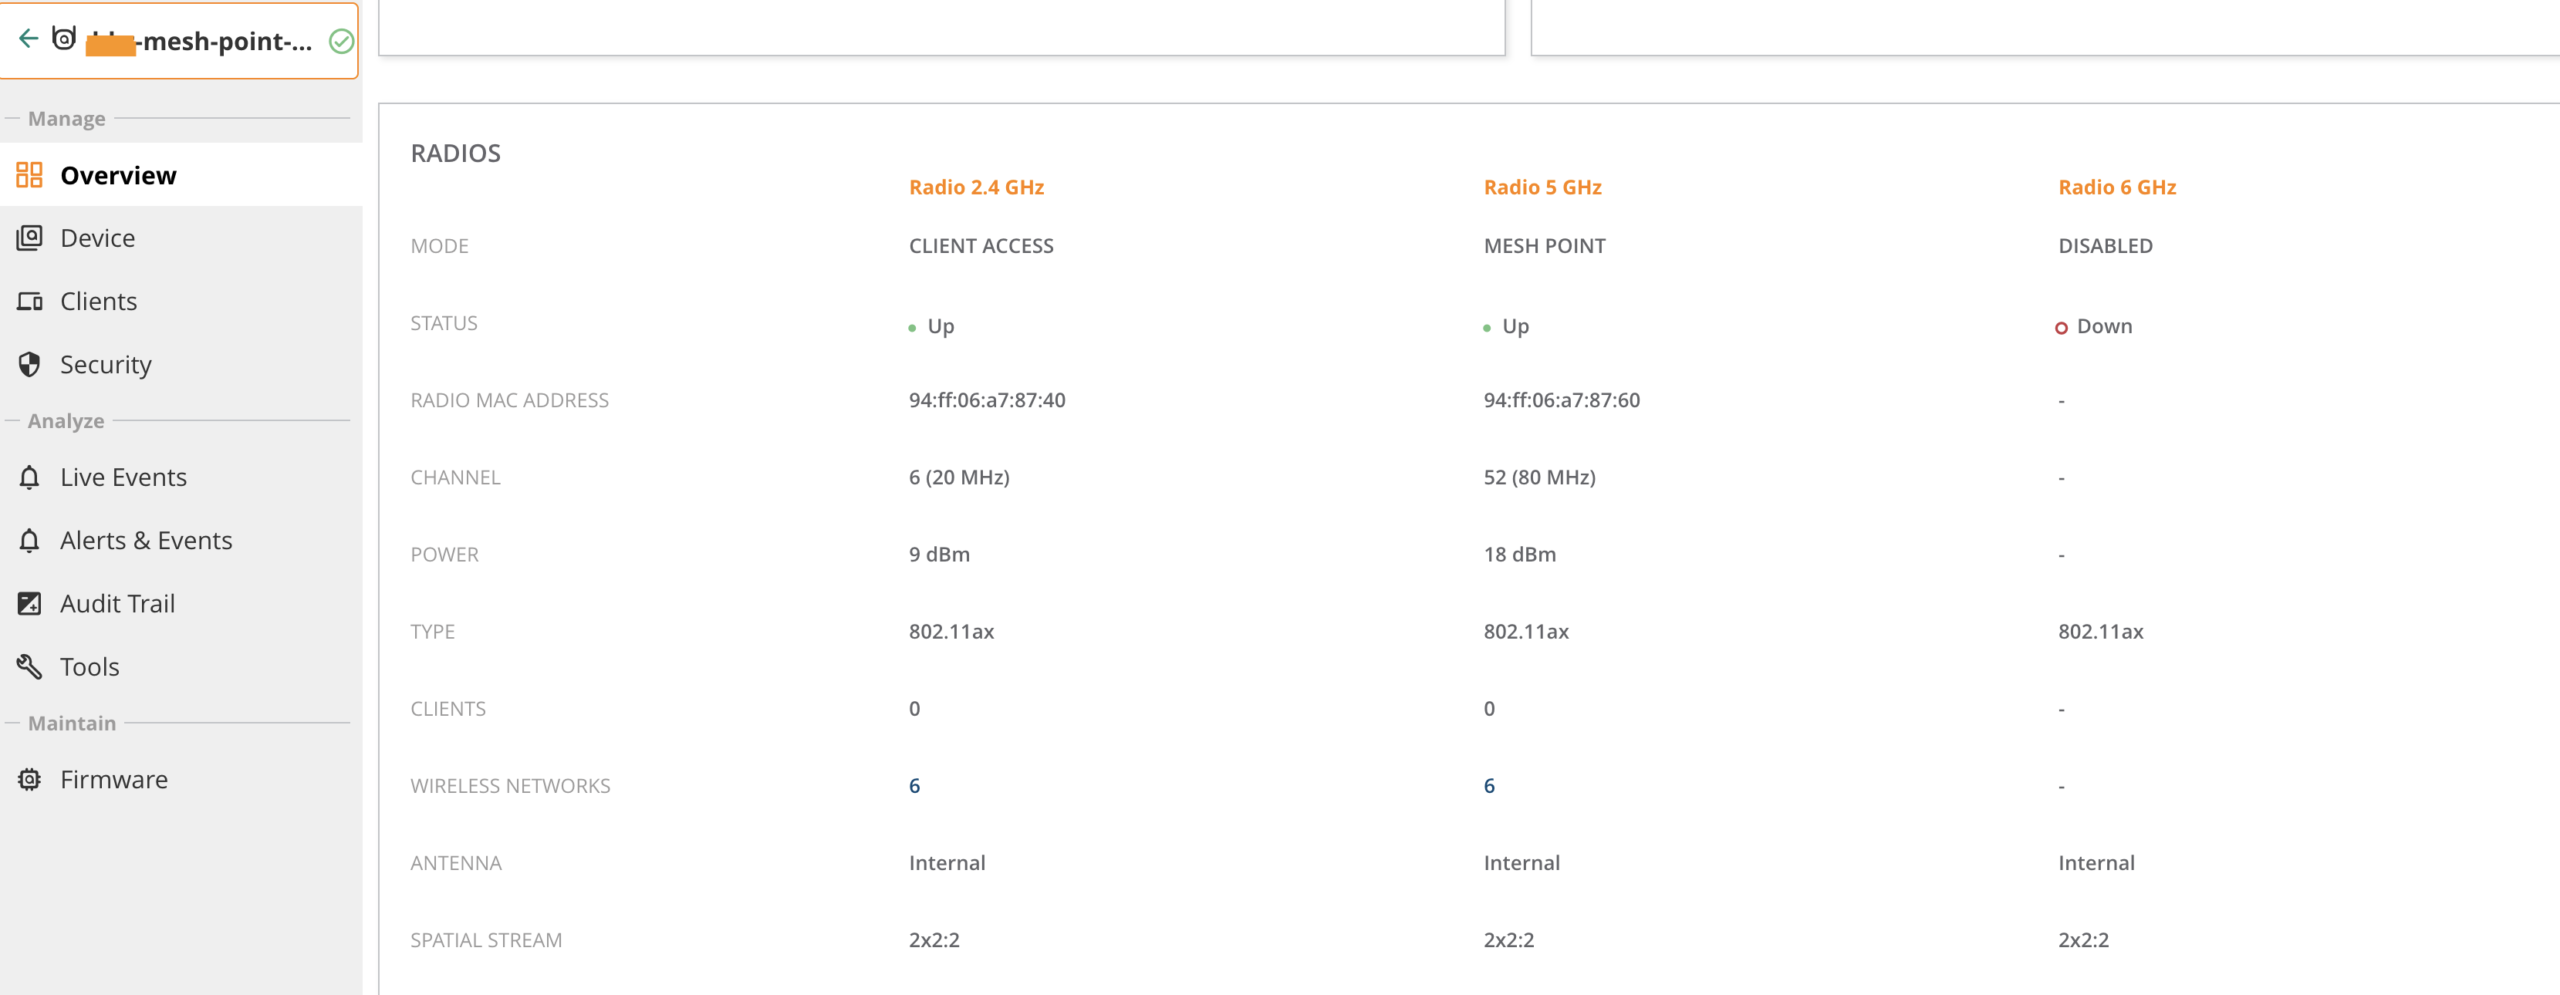
For this setup, I configured a dedicated AP group specifically for mesh access points, using HPE Aruba 675 series APs. The mesh backhaul operates on 5 GHz, as using 6 GHz outdoors is not permitted within the EU (including the Netherlands). To maximize throughput on the mesh link, the radio profile was configured with 80 MHz channel width.
In this deployment, the mesh point is responsible for terminating both wireless and wired clients. The Ethernet0 interface is used as the uplink to a switch, carrying multiple VLANs.
WLAN configuration works exactly as you would expect. The required SSIDs are broadcasted and tunneled back to the gateway.
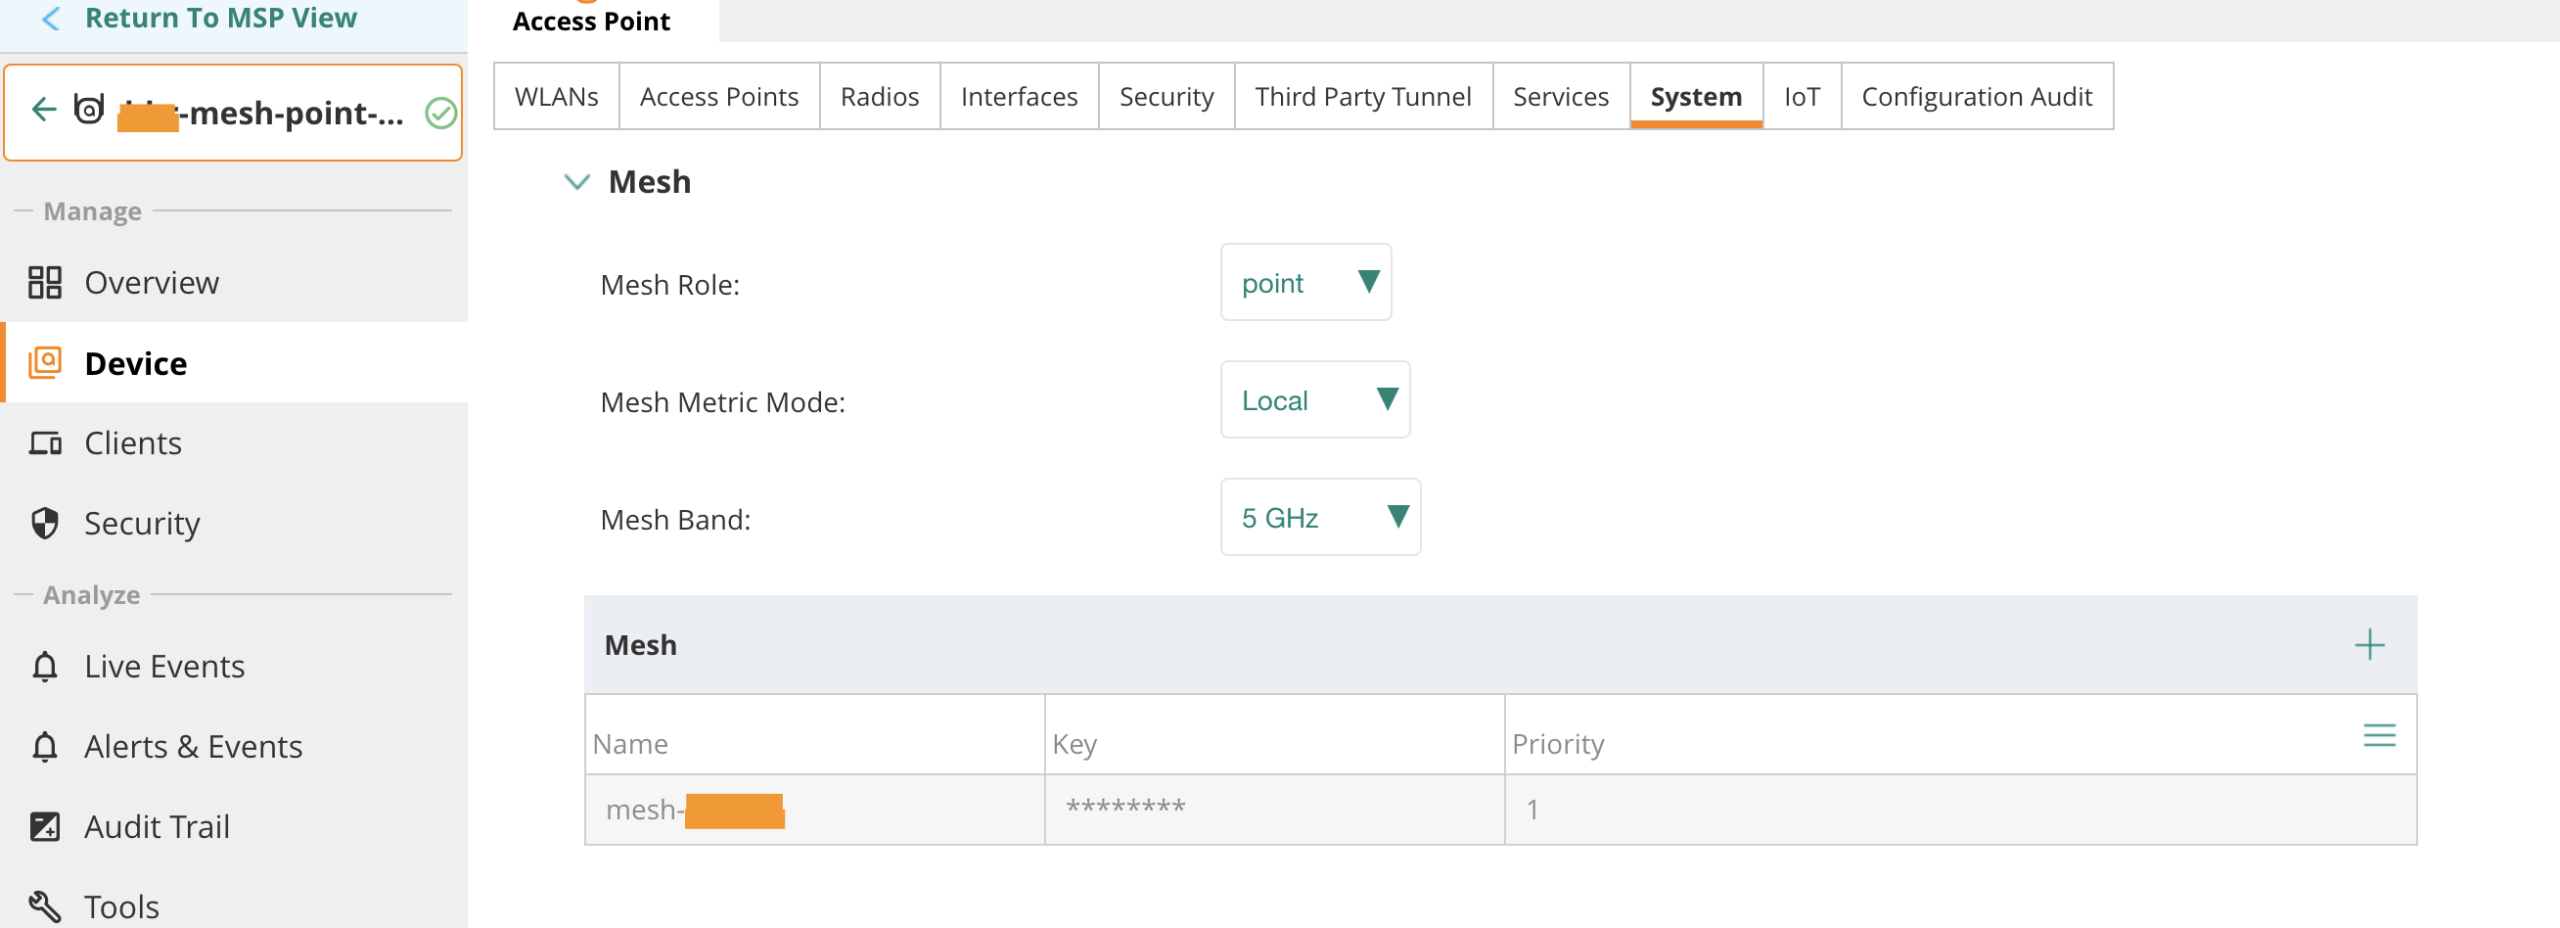
For mesh configuration, only minimal configuration is needed at the group level, which can be found under System → Mesh. Here, you can define multiple mesh profiles and assign priorities to them. In this case, I configured a mesh profile using 5 GHz with WPA2-PSK authentication. This provides a stable and secure backhaul connection between the access points.

The Mesh Role was initially set to AUTO. When no explicit role is defined per access point, Aruba Central will automatically assign the device as a mesh portal. Since this setup consists of only two access points, I configured the Mesh Metric Mode to Local. This means the mesh service is managed directly by the AP itself rather than by Aruba Central.
Important: After changing mesh-related settings, the access points must be rebooted for the configuration to take effect.
The next step is to explicitly define the mesh role for each access point. While AUTO works, I strongly recommend configuring roles manually for clarity and predictability. This can be done by selecting the AP within the group and navigating to: Config → System → Mesh.
- One AP is configured as a Mesh Portal (connected to the corporate network)
- The other AP is configured as a Mesh Point
The mesh point is connected to a switch which provides PoE to the access points. The mesh link is established and visible within Central.
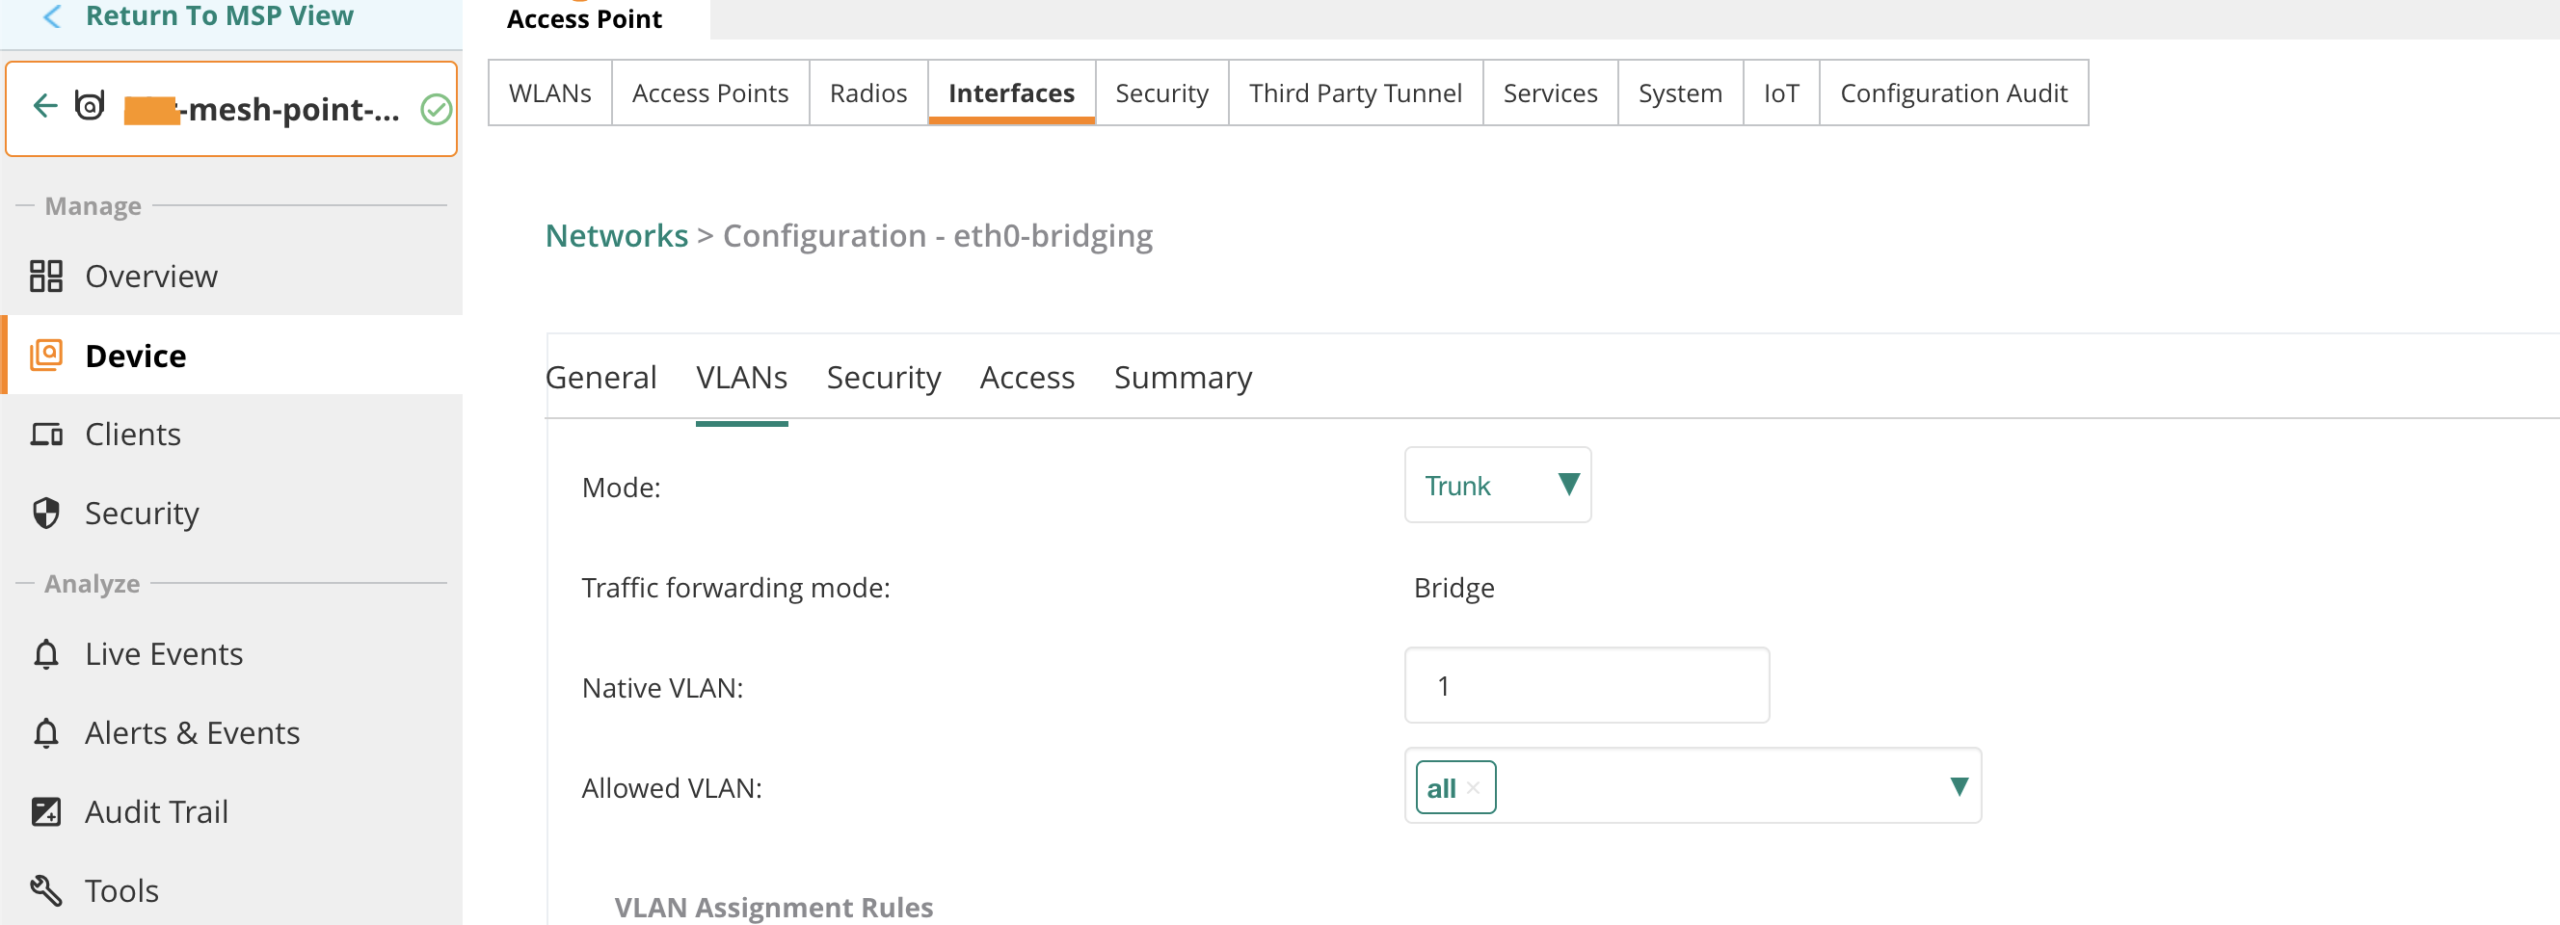
Finally, the wired port configuration on the mesh point is adjusted to support VLAN trunking. This allows wired devices connected to the mesh point to access the required networks transparently over the wireless backhaul.
The configuration of the wired uplink on a mesh point is done at the device level. Navigate to Device → Config → Interfaces → Wired. Add an additional Wired Port Profile and assign this profile to Ethernet0. Make sure to change the Port Mode to Downlink/unbonded state; otherwise, Ethernet bridging will not function correctly.

I always enable STP and Loop Protect to prevent potential loops or STP misconfigurations. BPDU packets are forwarded over the mesh link, meaning the switch port connected to the mesh point effectively becomes the port facing the Root Bridge and behaves like a standard uplink port between two switches.
Because multiple VLANs need to be transported over the mesh link, Eth0 is configured as a trunk port with VLAN 1 as the native VLAN. On the connected switch port, the management VLAN for the access points is also configured as the native VLAN on the trunk.
No authentication is required on this port, as wired authentication is handled by the switch upstream of the mesh point. For this reason, Eth0 is configured with Port Type set to Trusted.

This configuration should be sufficient to get the setup operational. I successfully connected a wireless client to the broadcasted SSIDs; WPA3-Enterprise authentication is handled by ClearPass, and client traffic is tunneled to one of the two gateways in the cluster. In addition, I connected a wired client to the downstream switch on one of the VLANs tagged on the uplink. The client successfully obtained an IP address from the central DHCP server and was able to access the network without issues.
So far, everything is working as expected.
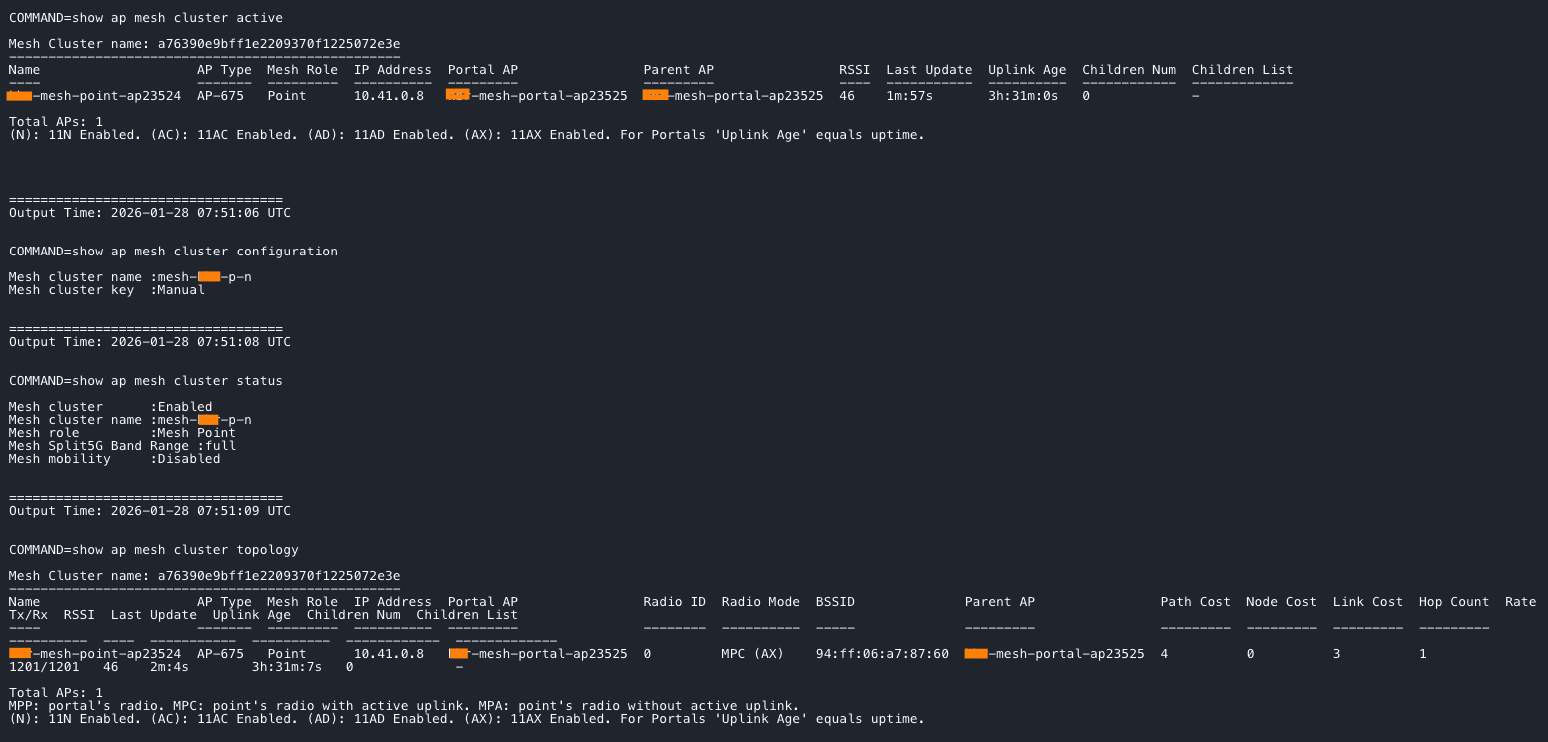
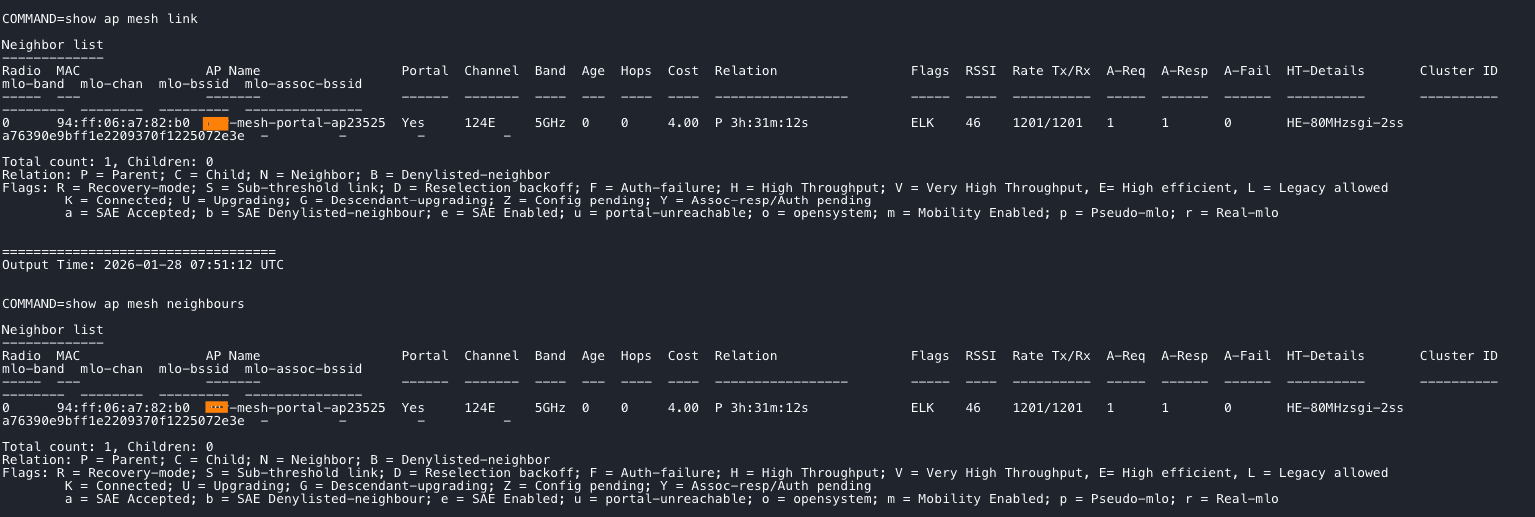
Multiple commands can be used to verify the mesh configuration. The commands can be run at the AP CLI or via the Tools options within Central.

René Jorissen
Latest posts by René Jorissen (see all)
- Aruba AOS 10 and Mesh Networking - January 28, 2026
- Deploy HPE 9106 gateways - January 20, 2026
- Uninstalling the HPE Axis Connector on Ubuntu - December 17, 2025